

A Guide to Floor Water Damage Repair
Hardwood floors give elegance and warmth to a home. But unfortunately, water damage can leave these beautiful surfaces warped, discolored, and in need of repair. You can usually manage minor water damage yourself, but you’ll likely need professionals for extensive damage.
This guide will help you fix water damage on your water damaged wood flooring and make them look great again.
Act Swiftly: First Steps Matter
The moment you discover water damage on your hardwood floors, time is of the essence. Stopping the source is crucial to prevent further floor water damage. If it’s a water leak or burst pipe, shut off the water supply. If it’s external water, address the entry point as soon as possible.
Use towels, a wet/dry vacuum, or a mop to absorb as much excess water as possible. Don’t push the water further into the floorboards. Improve ventilation by opening windows and doors to promote air circulation and drying. Consider using fans to increase airflow across the affected area.
Assess the Damage
Once you address the immediate threat, assess the damage and decide what action to take next. Carefully examine the affected area, noting the size, depth, and severity of the water damage. Look for warping, discoloration, and raised or buckled boards.
If the water seeped beneath the floorboards, inspect the subfloor for signs of damage like mold or rot. This might require removing some floorboards for inspection.
Its highly recommend consulting a professional restoration company for extensive damage. Their expertise and equipment can ensure a thorough and effective repair.
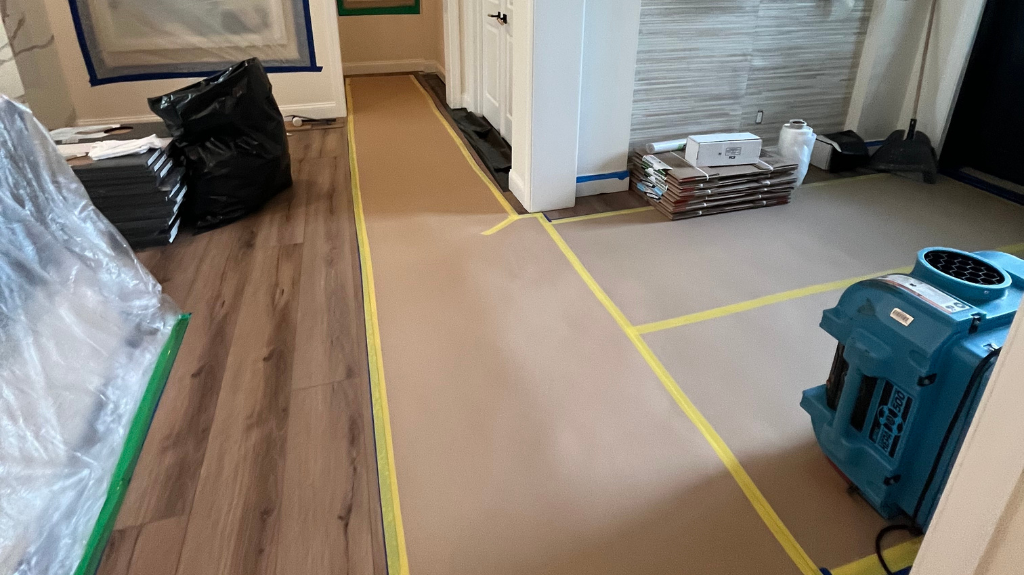
Removing the Moisture
Drying the affected area thoroughly is crucial to prevent further damage and mold growth. Keep windows and doors open, and use fans to promote air circulation and drying. Aim for consistent airflow across the entire affected area.
Renting a dehumidifier can significantly accelerate the drying process. Position it in the affected area and monitor the humidity levels, aiming for a range of 30-50%. Don’t use space heaters, hair dryers, or other direct heat sources on the floorboards. It can make them warp and crack.
Removing Debris and Dirt
After the floor is mostly dry, it’s crucial to clean it well to remove any leftover dirt, debris, or water residue. Use a soft-bristled broom or vacuum cleaner to remove loose debris like dirt, mud, or sand.
For a deeper clean, mix a mild detergent with warm water in a bucket. Use a damp mop, wrung almost dry, to gently clean the affected area. Avoid saturating the floor with water.
After cleaning, rinse the floor with clean water and a clean mop to remove any soap residue. Wipe up any excess moisture with dry towels and allow the floor to air dry completely.
Addressing Minor Damage
For minor surface damage like scuffs or discoloration, sanding and refinishing can restore the floor’s appearance. Once the floor is dry, use a fine-grit sandpaper to gently sand the affected area. This will remove any stained or discolored surface wood.
Thoroughly vacuum the sanded area to remove dust and debris. Wipe down the area with a damp cloth to remove any remaining dust. Apply a new coat of stain or sealant, following the instructions. Match the existing finish as closely as possible for a seamless look.
Replacing Damaged Boards

If the floorboards warp, buckle, or sustain severe damage, you must replace the flooring. Carefully pry up the damaged boards using a pry bar or flathead screwdriver. Work gently to avoid damaging surrounding boards.
Look for boards that match the existing floor in terms of species, thickness, and finish. If exact matches are unavailable, consider using boards from a hidden area like a closet or under appliances.
The next step is to install replacement boards. Cut them if needed, then attach to the subfloor with nails or glue, following instructions. Sand the new boards and the surrounding area to achieve a uniform texture. Put stain or sealant on the new boards, then refinish the whole area to make it look uniform.
Additional Tips for Successful Restoration
Don’t hesitate to seek professional guidance if you’re unsure about any step of the repair process. A qualified contractor can assess the damage and recommend the best course of action for your specific situation.
Wear gloves, eye protection, and a dust mask while working to protect yourself from dust, debris, and potential splinters.
Restoring water-damaged hardwood floors requires patience. Allow the floor to dry completely at each stage before proceeding to the next step. Rushing the process can worsen the damage.
Prevent future problems
After fixing, find and fix the source of the water damage to avoid it happening again. This might involve repairing leaky pipes, addressing drainage issues, or improving waterproofing measures around areas prone to water ingress.
Follow these steps and tips to fix small to medium water damage on your hardwood floors and make them beautiful and functional again. Remember, for extensive damage or situations requiring professional expertise, contacting a qualified restoration company is the best course of action. With proper care and attention, you can ensure your hardwood haven thrives for years to come.
Frequently Asked Questions
How do you dry hardwood floors after a water leak?
The first step is to act immediately by stopping the source of the water and absorbing as much excess liquid as possible using towels, a mop, or a wet/dry vacuum. To dry the wood thoroughly, you should open windows and doors to increase air circulation and use fans to move air across the affected surface. We strongly recommend using a dehumidifier to pull moisture from the air and the wood, aiming for a humidity level between 30 and 50 percent. It is important to avoid using direct heat sources like hair dryers or space heaters, as these can cause the wood to warp or crack.
How do you fix water-damaged hardwood floors?
Fixing the damage starts with a thorough assessment to see if the wood has warped, buckled, or discolored. After the area is completely dry and cleaned of all debris, minor surface damage can often be fixed by sanding the affected boards and applying a new coat of stain or sealant that matches the rest of the floor. If the boards are severely buckled or warped, they will need to be carefully removed with a pry bar and replaced with new boards of the same species and thickness before being finished to match.
Can water-damaged hardwood floors be repaired?
Yes, in many cases, hardwood floors can be repaired. Minor issues like surface staining or light warping can usually be handled through drying and refinishing. However, if the water has seeped into the subfloor or caused extensive rot and mold, professional restoration is necessary. We always suggest consulting with a specialist for extensive damage to ensure the structural integrity of your flooring and subfloor remains intact.
How long does it take to dry a hardwood floor after water damage?
There is no set timeframe because drying depends on the volume of water and the environment, but the most important factor is patience. You must allow the floor to dry completely at every stage of the restoration process before moving on to cleaning or repairs. Using professional-grade dehumidifiers can help accelerate this process, but rushing it can lead to long-term issues like mold growth or structural failure.
What should you do when water gets on hardwood floors?
You must act swiftly because time is of the essence. Immediately stop the flow of water by shutting off the main supply if the leak is internal. Once the water is stopped, use a vacuum or towels to remove standing water so it doesn’t have a chance to seep deeper into the wood or the subfloor. After the surface is clear, increase ventilation and start the drying process right away to minimize damage.
How do you remove moisture from hardwood floors?
To remove moisture effectively, you need a combination of airflow and humidity control. Use fans to keep air moving and open up the space by keeping doors and windows open. The most effective way to extract deep-seated moisture is with a dehumidifier, which should be positioned directly in the affected area to stabilize the humidity levels. Once the floor is dry, we also recommend checking the subfloor for any trapped moisture that could lead to rot or mold over time.